
Tuesday, July 31, 2012
Tutorial Tuesday: Hair
I thought since it was Tuesday, I'd do a hair tutorial on a fishtail braid. I think this look is super cute and is a go anywhere, easy type of look. I love it, and i know some girls don't know how to fish tail, so I thought it would be a good idea to put up a tutorial. And thanks to www.CurlsNPearls.com for the tutoral. Enjoy!
Monday, July 30, 2012
Cyber Bullying
Girl Talk: Dealing with Cyber Bullies

I’ve definitely had a few encounters with cyber bullying. I think the reason online bullies tend to be so mean is because they can hide behind their computer screens and escape some of the guilt that comes along with bullying in person. Cyber bullies feel like they can get away with hurting people’s feelings because they are sitting in their room typing mean things instead of actually saying those things to someone’s face. It is so easy for a bully to get carried away with hurtful words, and I wish more than anything that people would just stop cyber bullying! But until my wish comes true, I’ve decided to share some of my helpful tips on how to deal with online bullies. Check them out below!
I’ve definitely had a few encounters with cyber bullying. I think the reason online bullies tend to be so mean is because they can hide behind their computer screens and escape some of the guilt that comes along with bullying in person. Cyber bullies feel like they can get away with hurting people’s feelings because they are sitting in their room typing mean things instead of actually saying those things to someone’s face. It is so easy for a bully to get carried away with hurtful words, and I wish more than anything that people would just stop cyber bullying! But until my wish comes true, I’ve decided to share some of my helpful tips on how to deal with online bullies. Check them out below!
- Don’t respond. Bullies like to feel in control of the people they hurt, so don’t let them control your emotions. The best response is no response! If you get so upset that you respond with an equally mean comeback you might in fact be bullying right back. Just ignore the bully and forget their mean words.
- Save every message. Always make sure you save, screen shot, or print every hurtful message a bully sends to you. If you feel that they bullying gets so out of hand, you can use these documents to report it. Having these printed messages as proof will help you prove that bullying has been going on.
- Block the bully. Similar to just ignoring them, blocking a bully makes it so that they can’t contact you at all anymore. If someone is really going out of their way to hurt your feelings, block all contact with them and try to erase them out of your life.
- Tell a trusted adult. Sometimes it’s a little embarrassing to admit that a bully is saying hurtful things to you, but telling a parent, teacher or coach is a good way to get advice on how to handle a bully. Most adults have already had experience with bullying in their lives too, so they can probably help you get the situation under control. Make sure to bring your printed copies of the conversation with you so you can show a trusted adult exactly what’s been going on.
- Focus on the positives. Remember that a bully is just trying to make themselves feel stronger by putting you down. Don’t dwell on the negative words they might say—instead, remember all the great qualities you bring to the table! You have friends and family who love you and the people you care about are really the only people who matter. When someone has made me feel down in the past, I’ve written a list of my favorite qualities about myself and it perked me right up!
I hope that you never have an encounter with a cyber bully (trust me it’s not fun!), but if you do, please remember these tips because they’ve worked for me in the past too. And remember, in the words of Eleanor Roosevelt, no one can make you feel inferior without your consent!
Friday, July 27, 2012
Perms
Hey beauties! Today's post is all about perms. Perms can make your hair gorgeous for a special occasion or on an everyday scale. However before you get your perm done, keep these tips in mind.
If you are naturally straight headed, and get a wavy, crimped or curly perm, you should be cautious of brushing. If you brush it when dry, beware of your hair puffing out bigger than a 70's Afro. This goes for when curling your hair with a curling iron and overnight braiding. Brush or comb your perm only when it's wet.
Only perm when necessary. Too many perms can result hair loss. This is due to all the chemicals used to perm your hair. Maintain a reasonable time distance between perms to keep this from happening.
Maintain hydration when having a perm. If you have a curly perm, scrunch your hair!When wet use scrunching gel and mouse to scrunch it. If it is dry than use scrunching motions to help the hair keep it's shape.
And as always, get your hair done by a person who knows what they are doing. I have a friend who had to get her perm done three times because they kept getting the chemical mixture wrong. And she had frizzy hair each failed attempt. Q: Why didn't she try again right when it failed? A: because she knows, DON'T OVER PERM! :) Remember to get a perm you love. Perm is short for permanent. Keep these tips in mind when perming.
Thursday, July 26, 2012
Ways to Wear Color
Today's blog is all about adding color in your life and embarrassing a bolder image. No five year old ever threw herself on the floor, kicking and screaming over the tan crayon. Purples, Blues, and bright oranges were the ones we wanted. Gradually they faded to blacks, whites and beiges. It's important to add a pop of color, to release your inner child. Lately on the fashion runway, models were sent out with colors that a peacock would envey. In this blog I'll show you some easy ways to add a splash of color in your life.
One way to throw some color in is a french manicure with a neon colored tip. Or you could do unexpected loud pairing if you are really adventurous. Some ideas for could be nude with a glitter tip. or possible a grey nail with a neon pink tip. The tips should be skinny. There are many possible ideas for colorful nails and the best way to do it is make it your own.
Get cheeky! Wear highlighter as a base than spread a peach pink or apricot blush on the top. It gives a hint of color and a nice glow.
Why not try a metallic liquid eyeliner. It can look great when applied right. What you should do is make a thin streak above the upper lashes with just the slightest flick. Another way to wear it is to trace the upper lashes with a black gel or cream, than place the color line where they don't overlap but still touch.
When wearing eyeshadow it's great to go for that color look but not if, for two years you have been using neutral tones. Also, if you find a shade that works for you don't out of the blue switch to a crazy color. Pastels look pretty blended around the eye. You can even add a thin line of black eye liner for definition. Bright blues make the whites of your eyes look whiter. Brush them across your lower lash line. There are too many eyeshadow combinations to name!
There are plenty of ways to wear color. How you wear it is up to you!
Wednesday, July 25, 2012
DIY: Fun Soapsicles
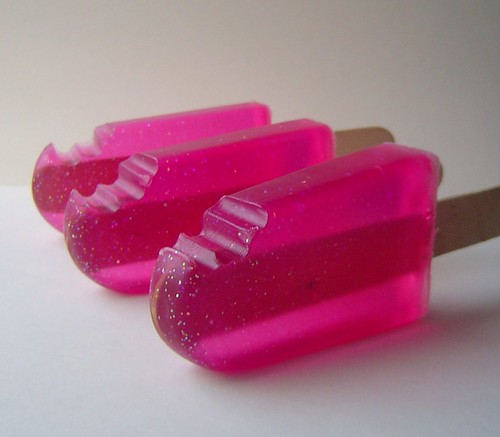
I love these “Soapsicles”! They are SO cute and could easily be made on your own. I think these would make such good party favors or little gifts to attach to gift tags on presents for any occasion. You could customize them any way you’d like and then wrap them up in a little bit of cellophane, tie with a ribbon, and presto! You’ve got your very own beauty “treat.” These are perfect treats for spa parties or get-togethers with your friends. You could either try to make them with your friends or give to them along with their pedi buckets at an at-home spa party.
Here’s how to make these on your own:
You need:
Here’s how to make these on your own:
You need:
- Soap (more on that below)
- Coloring (you can use a colorant or basic food coloring)
- Popsicle sticks
- Popsicle molds
- Rubbing alcohol
- Paring knife
For the soap:
- You’ll need to either make your own soap from scratch or a kit. Most craft stores will sell Melt & Pour soap bases or you can find them online. With a pre-made soap base, all you need to do is simply melt the desired amount of soap. This can be done either in the microwave (melt until creamy, about 30 seconds) or on the stove with a double boiler (improvise by placing the soap into a measuring cup within a larger pot). Once it’s been melted you can add in any fragrance, color, or oils that you’d like to include. To make soap from scratch, melt about a pound of glycerin in a double boiler.
Directions:
- While your soap is melting, lightly coat the inside of the mold you wish to use with a vegetable oil so that it’s easier to remove
- Quickly pour the soap into the molds, insert the popsicle sticks, and spray the tops of the soapsicles with rubbing alcohol to get rid of any bubbles
- Let the soapsicles harden for a couple hours
- Once they are done cooling and have completely hardened, remove them from the mold and using the paring knife to trim and perfect the edges
Get creative with the colors and try out a few different molds to make your soapsicles unique! You can even make shaped soap bars out of other molds. The choice is totally up to you!
Tuesday, July 24, 2012
Six Common Flatiron Mistakes
Six things you really should know before you flat iron your hair.
1. Don't crank it up all the way. Your hair doesn't need 450 degrees of heat. Even the thickest hair can only take 410.
2. Don't forget protection. Get flatiron protection. It is best to squirt it in your hand and than lather it in your hair. It can really grease your hair.
3. Don't run over (and over and over) your curls. Get hair as straight as possible by stretching each piece out with a brush. Than iron slowly and steadily in a sing pass.
4. Don't go board-straight. Make a C-shape with your hair by curling the ends in with the flat-iron.
5. Don't iron damp hair. Sizzling and steam are never good.
6. Bigger isn't better. You can't get to your hairline with a hunking big iron. One inch to one and a half inches is the biggest width your iron should be.
Keep these tips in mind when running a flat iron through your hair. They really make the difference to your hair.
Saturday, July 21, 2012
Manicure Trouble
What could Gel Manicures be doing to your nails?
Gel manicures can last two weeks without chipping, but did you know that they can damage nails. Dermatologists at the University of Miami Miller School of Medicine have reported five cases of women who developed discoloration, peeling, brittleness, and breakage after the removal of a gel manicure. The damage could have been caused by chemicals in the actual nail polish or by the removal process, which may strip off layers of the nail. I advise you to reserve your gel manicure for a special occasion or avoid them altogether if you have weak nails.
Gel manicures can last two weeks without chipping, but did you know that they can damage nails. Dermatologists at the University of Miami Miller School of Medicine have reported five cases of women who developed discoloration, peeling, brittleness, and breakage after the removal of a gel manicure. The damage could have been caused by chemicals in the actual nail polish or by the removal process, which may strip off layers of the nail. I advise you to reserve your gel manicure for a special occasion or avoid them altogether if you have weak nails.
Friday, July 20, 2012
Glit Fit: Tips on staying healthy
Glit Fit!
Hey everyone! "Glitting" fit this summer can be easier than you think. Here are some quick tips for staying active and even losing weight.
Hey everyone! "Glitting" fit this summer can be easier than you think. Here are some quick tips for staying active and even losing weight.
- No food after 7:00 PM. Your body needs time to digest your food and after 7:00 PM it can't digest very well.
- Avoid eating when stressed, upset, studying, or watching TV.
- Occupy yourself with things to do rather than eating. If you eat when you are board than find something better to do with your time!
- Remind yourself that the difference between "try" and "triumph" is just a little "umph"! Marvin Phillips said that.
- Try jogging, aerobics, yoga or one-song workouts. One song workouts can be found in the picture below and are quick and effective for burning calories. You don't have to do it all in one day. Pace your self throughout the week. You can even go to the gym. Just make sure you stay active and watch those calories.
- Stock up on healthy foods. If you have healthy food in your fridge you are going to eat that instead of a Twinkies. If you have food that is really bad for you you will accumulate bad eating habits.
 |
| One Song workouts |
Work hard on staying fit this summer and steer clear of unwanted calories. Check out the One song workouts that you can do before bed or when you wake up. Best wishes for staying fit!
<3 Always,
-Caly Farrell
DIY: Glittify your charger
Hey everyone! Today’s post is all about glamming up your boring old cell phone charger, and of course there’s no better way to do that than by covering it with glitter! This DIY project is super easy to do, so say goodbye to ordinary and hello to fabulous!
What You’ll Need:
What You’ll Need:
- Mod podge – clear works and looks the best
- Glitter – Choose any size and color that you want. Be creative: mix and match!
- Clear acrylic sealer – This will ensure that your masterpiece can last as long as possible!
- Masking tape – Be sure to choose one that won’t leave any sticky residue and tape over the metal plugs so you don’t damage the charger
Directions:
- Start out by taping over all of the metal pieces so they don’t get ruined while you get crafty
- Paint over where you want to add glitter with your clear mod podge
- Before the base coat dries, add as much glitter as your heart desires!
- Once you have the glitter exactly how you want it, let it all completely dry
- To finish, apply a coat of the clear acrylic sealer to keep everything in place and to avoid a future mess!
- Lastly, remove all of the tape from the metal pieces and try it out to make sure it still works

Subscribe to:
Posts (Atom)